前言

我正在开发一个教育项目。今年,孩子们需要用英语写作。
尽管我们越来越多地以电子格式打印文本,但手写在日常和职业生活中仍然很流行。
食谱对于儿童和成人都是有用的。有些还在学习写作,有些还在训练中。
对于我们而言,创建一个快速便捷地选择处方的系统非常重要。因此,我们决定制造自己的发电机。
这个话题很有趣,但是互联网上的信息很少。因此产生了编写用于创建自己的配方的说明的想法。
目标
的原因
- 价格:一套约300卢布
- 根据需要解决的问题发布更多个人任务的能力
- Internet上没有关于此主题的特定信息,弄清楚它是如何工作变得很有趣。
- 如果拥有自己的技术,则可以对其进行完善(例如,添加更改文本大小的功能或与配方相关的特殊任务的生成器)
创建过程
由于我的项目的特殊性,我的实现是在PCP上完成的,因此我确信有很多其他有趣且不错的选择来解决此问题。
问题的提法
您应该始终从简单的问题陈述开始。什么是配方生成器?这是一个简单的图。
我们输入文本,然后从文本中创建一个pdf文件,并带有笔记本纸和手写字体的设计,必须勾勒出轮廓。
- 文字输入
- 创建一个pdf文件
- ( , )
如果普通的html可以帮助我们同时输入文本和发送表单,那么要生成pdf文档,我们需要一个特殊的库,我的眼睛落在fpdf上(它很小,免费,简单-是解决问题的理想之选)。
有数据发送,有一个pdf生成器,现在您需要一种字体。
有一个很好的字体学习曲线,可以完美解决我们的问题。字体将需要在fpdf网站上进行处理,以便您可以将其添加到脚本中(cp1252编码很好)。
现在仍然需要设计笔记本工作表:我从fpdf网站获取了绘制单元格的功能,删除了其中的垂直线,添加了斜线和边距。
最后,收集了所有必要的元素之后,您就可以创建一个配方生成器。
全部放在一起
我们使用表单提交设计html页面(我在这里进行了设计):
- 让我们来选择字体选择字段(灰色和虚线)
- 让我们创建一个文本输入字段
- 发送数据按钮
create-exercise.html
<!DOCTYPE html>
<html>
<head>
<meta charset="UTF-8">
<link rel="stylesheet" href="style.css">
</head>
<body>
<form class="decor" action="gotopdf2.php" method="post">

  <div class="form-left-decoration"></div>
  <div class="form-right-decoration"></div>
  <div class="circle"></div>
  <div class="form-inner">
	<h3>   </h3>
		<p> <input type="radio" name="type_letter_propisi" value=0 checked></p>
		<p> <input type="radio" name="type_letter_propisi" value=1></p>
    <h3>  :</h3>
	<textarea name="data1"rows="10"></textarea>
    <input type="submit" value=" ">
  </div>
</form>
</body>
</html>
style.css
* {box-sizing: border-box;}
body {background: #f69a73;}
.decor {
  position: relative;
  max-width: 400px;
  margin: 50px auto 0;
  background: white;
  border-radius: 30px;
}
.form-left-decoration,
.form-right-decoration {
  content: "";
  position: absolute;
  width: 50px;
  height: 20px;
  background: #f69a73;
  border-radius: 20px;
}
.form-left-decoration {
  bottom: 60px;
  left: -30px;
}
.form-right-decoration {
  top: 60px;
  right: -30px;
}
.form-left-decoration:before,
.form-left-decoration:after,
.form-right-decoration:before,
.form-right-decoration:after {
  content: "";
  position: absolute;
  width: 50px;
  height: 20px;
  border-radius: 30px;
  background: white;
}
.form-left-decoration:before {top: -20px;}
.form-left-decoration:after {
  top: 20px;
  left: 10px;
}
.form-right-decoration:before {
  top: -20px;
  right: 0;
}
.form-right-decoration:after {
  top: 20px;
  right: 10px;
}
.circle {
  position: absolute;
  bottom: 80px;
  left: -55px;
  width: 20px;
  height: 20px;
  border-radius: 50%;
  background: white;
}
.form-inner {padding: 50px;}
.form-inner input{
  display: inline;
  width: normal;
  padding: 0 20px;
  margin-bottom: 10px;
  background: #E9EFF6;
  line-height: 40px;
  border-width: 0;
  border-radius: 20px;
  font-family: 'Roboto', sans-serif;
}

.form-inner textarea {
  display: block;
  width: 100%;
  padding: 0 20px;
  margin-bottom: 10px;
  background: #E9EFF6;
  line-height: 40px;
  border-width: 0;
  border-radius: 20px;
  font-family: 'Roboto', sans-serif;
}
.form-inner input[type="submit"] {
  margin-top: 30px;
  background: #f69a73;
  border-bottom: 4px solid #d87d56;
  color: white;
  font-size: 14px;
}
.form-inner textarea {resize: none;}
.form-inner h3 {
  margin-top: 0;
  font-family: 'Roboto', sans-serif;
  font-weight: 500;
  font-size: 24px;
  color: #707981;
}

使用网格类编辑文件(创建笔记本表):
- 禁用垂直线
- 添加边距(红线,尽管在打印后仍为灰色)
- 我们将标尺的颜色设置为黑色,因为在黑白打印机上看不到笔记本的淡蓝色,但是在彩色墨水上则很可惜
- 我们通过三角形的切线写一条斜线。根据经验测得该角度应为25度
grid.php(修改后的文件,以前是用于创建网格的代码)
<?php
require_once('fpdf182/fpdf.php');

class PDF_Grid extends FPDF {
    var $grid = false;
	var $inclined = false;
	var $border = true;
	var $i_hl= 0;
	var $i_hl_up= 13.5;


    function DrawGrid()
    {
        if($this->grid===true){
            $spacing = 5;
        } else {
            $spacing = $this->grid;
        }
		$this->SetDrawColor(0,0,0);
        $this->SetLineWidth(0.35);
		$h_limit=$this->h-20;
        for($i=$this->i_hl;$i<$h_limit;$i+=$spacing){						//print _ horizontal lines
            $this->Line(0,$i,$this->w,$i);
        }
		for($i=$this->i_hl_up;$i<$h_limit;$i+=$spacing){						//print up_ horizontal lines 13.5
            $this->Line(0,$i,$this->w,$i);
        }

		//Create inclined lines
		$tan_treangle_inc_line=tan(deg2rad(25));
		if($this->inclined == true){							//print / inclined lines
			$this->SetDrawColor(0,0,0);
			for($i=4;$i<=55;$i+=7)
				$this->Line(12*$i*$tan_treangle_inc_line, 0, 0, 12*$i);
		}
		if($this->border == true){								//print |  right border line
			$this->SetDrawColor(255,0,0);						//red border
			$this->Line(185, 0, 185, 300);
		}

    }

    function Header()
    {
        if($this->grid)
            $this->DrawGrid();
    }

}
?>
现在,我们创建文件本身来处理数据并生成单词:
- 通过开关()添加字体选择
- 调整文本的大小(这里可以选择特定的值,因为A4纸的尺寸始终是相同的,这不是屏幕),对于孩子来说,最好选择较大的文本,因为他们仍在学习,并且很难用小写字母书写
gotopdf2.php(配置和创建所有内容的处理程序文件)
<?php
require_once('gridphp.php');

$pdf=new PDF_Grid();

	/*
	//
	*/

	$pdf->inclined = true;		//
	$pdf->SetMargins(5,5,25);	//
	$pdf->grid = 18;			//
	$pdf->AddPage();


	/*
	//   ( )
	*/

	switch ($_POST['type_letter_propisi']) {
    case 0:		//
		$pdf->AddFont('LearningCurve-Bold','','learning_curve_bold_ot_tt.php');
		$pdf->SetFont('LearningCurve-Bold','',36);
		$pdf->SetTextColor(140,140,140);
		break;
	case 1:		//
		$pdf->AddFont('LearningCurve-dashed','','learning_curve_dashed_ot_tt.php');
		$pdf->SetFont('LearningCurve-dashed','',36);
		$pdf->SetTextColor(0,0,0);
		break;
	default:
		$pdf->Write(18,",     ");
		break;
	}
	$text_propisi = mb_convert_encoding($_POST['data1'], "cp1252");
	$pdf->Write(18,"$text_propisi");		//


$pdf->Output();

?>
全部都准备好了!下面我附上获得的结果:
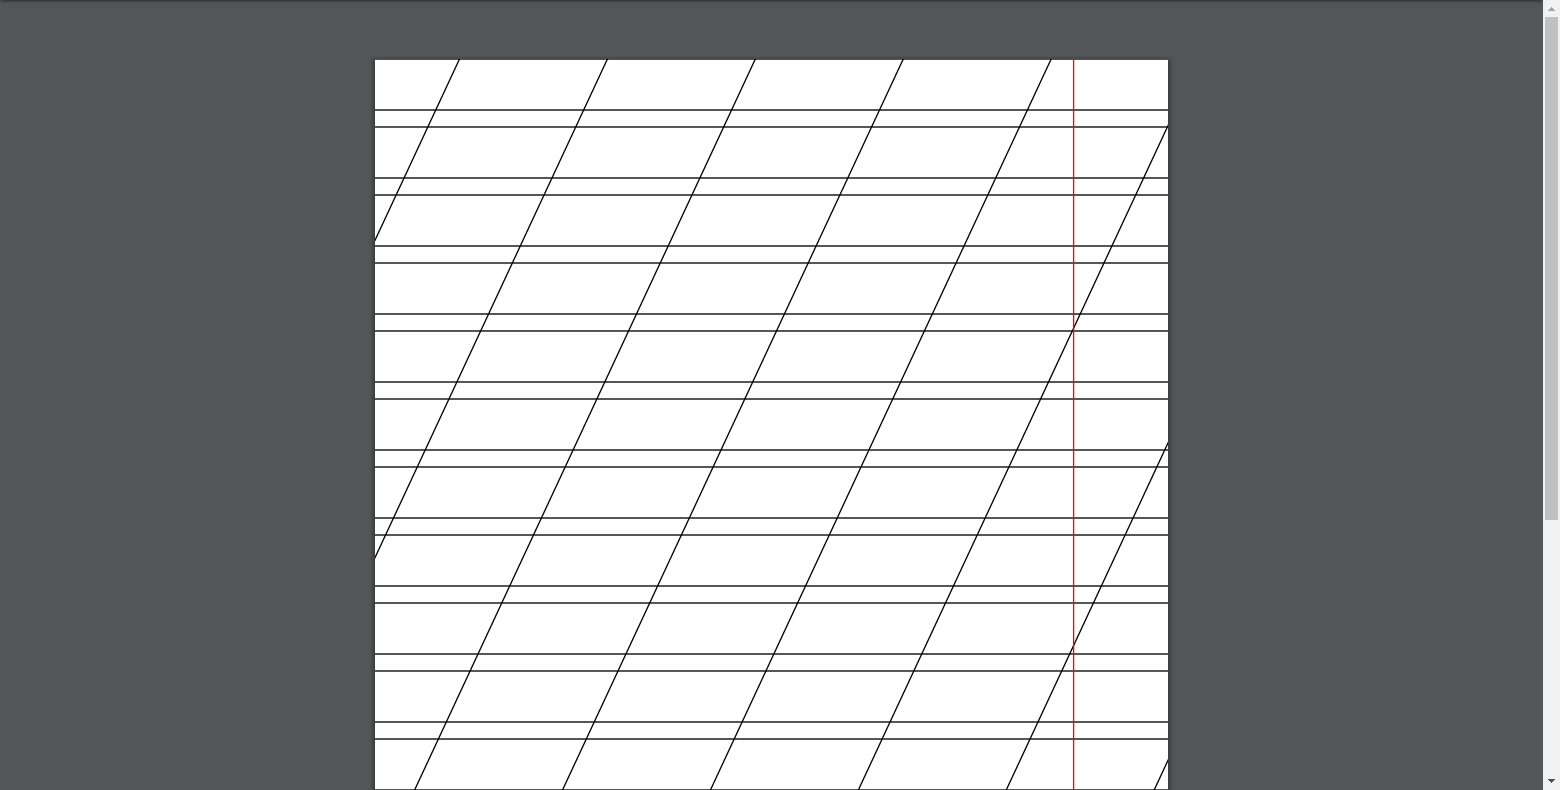
一张纸

正常的灰色轮廓
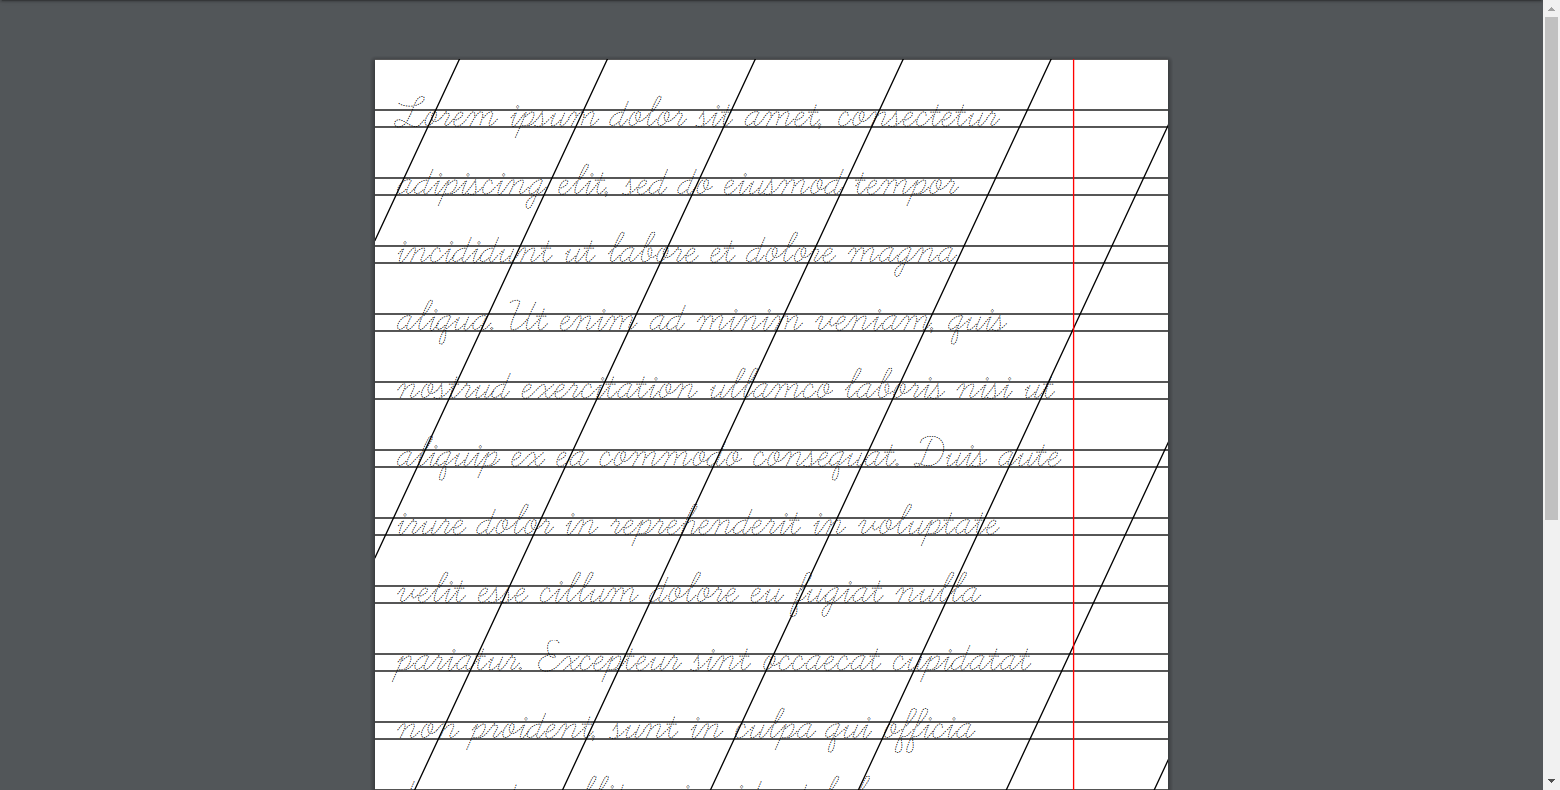
点缀的轮廓
输出量
我们以最低的成本获得了自己的配方生成器。然后,您可以在此处添加各种有趣的功能:选择字母,语言等的大小和颜色。
链接到GitHub
P.S. 我在本地服务器上做一个项目,使用过xampp