在本文的第一部分中,我们将为aarch64使用QEMU模拟器,在第二部分中,我们将启动Raspberry模拟器并在其中检查应用程序的功能。
我要代表自己注意,所有这一切并没有很快完成,如果您尝试执行所有这些操作,那么整个周期将需要几天的时间!)
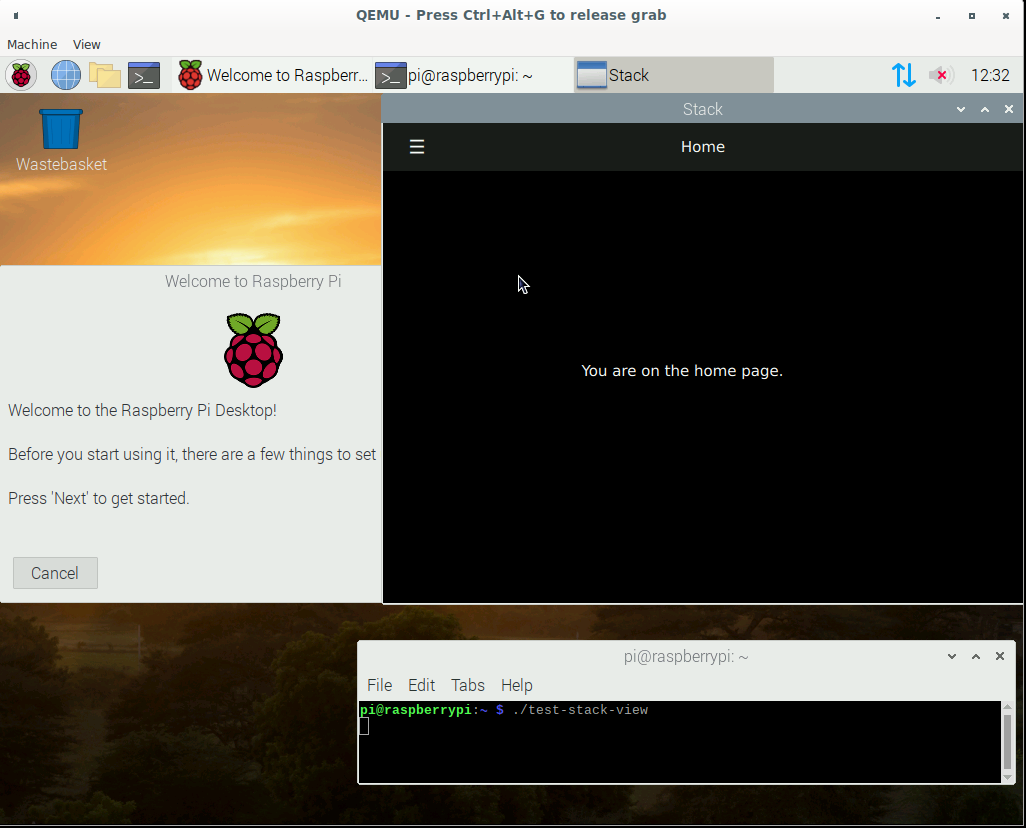
在CentOS ARM上从Qt源构建
要在主机系统上安装,我们需要安装QEMU仿真器。在基于Debian的发行版中,这是qemu-system-arm软件包。要以图形方式管理虚拟机,可以安装virt-manager。
启动后,创建一个虚拟机:
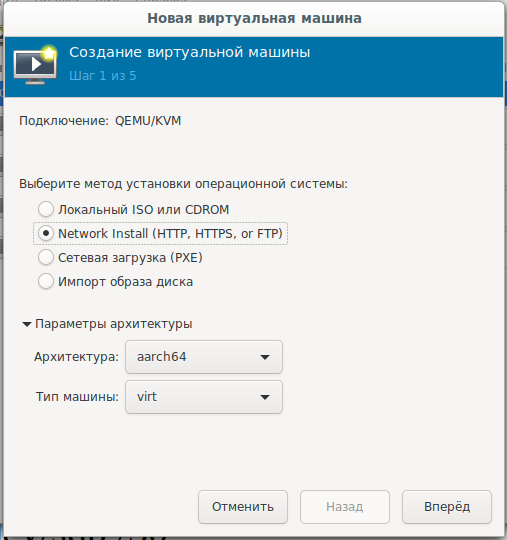
并选择网络引导网址:
mirror.centos.org/altarch/7/os/aarch64设置
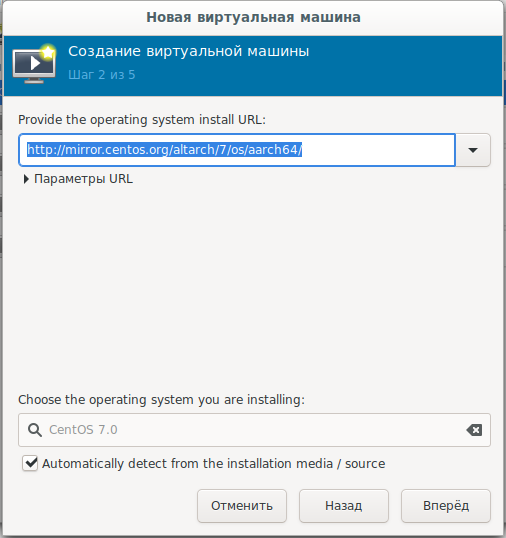
处理器和RAM的数量:
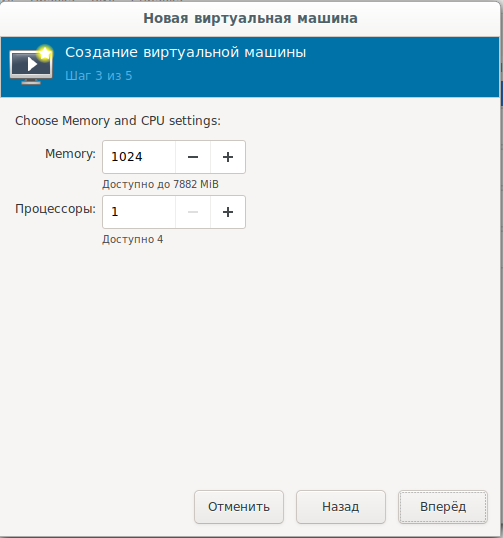
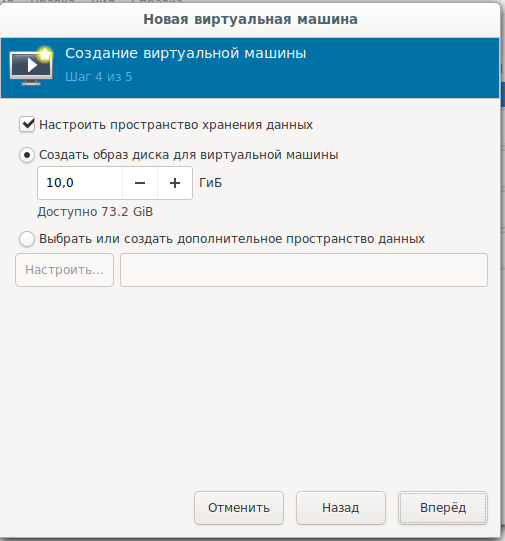
设置系统磁盘的大小:
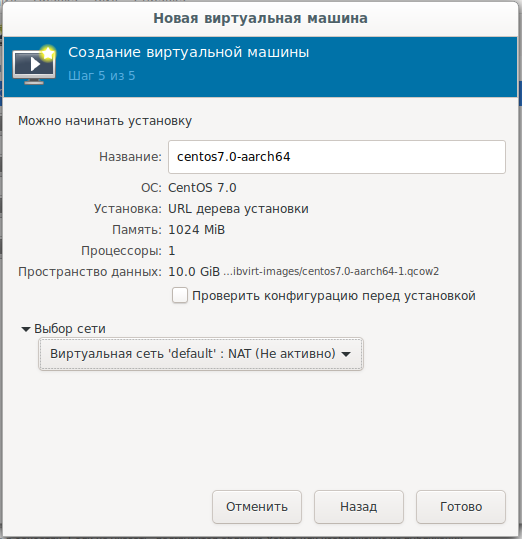
最终设置,网络选择:
对于那些想要下载的用户或脱机安装,有一个磁盘映像:
arm64
接下来,您需要以文本模式将系统安装在硬盘上,选择必要的答案选项,并以肯定的答案进行确认:
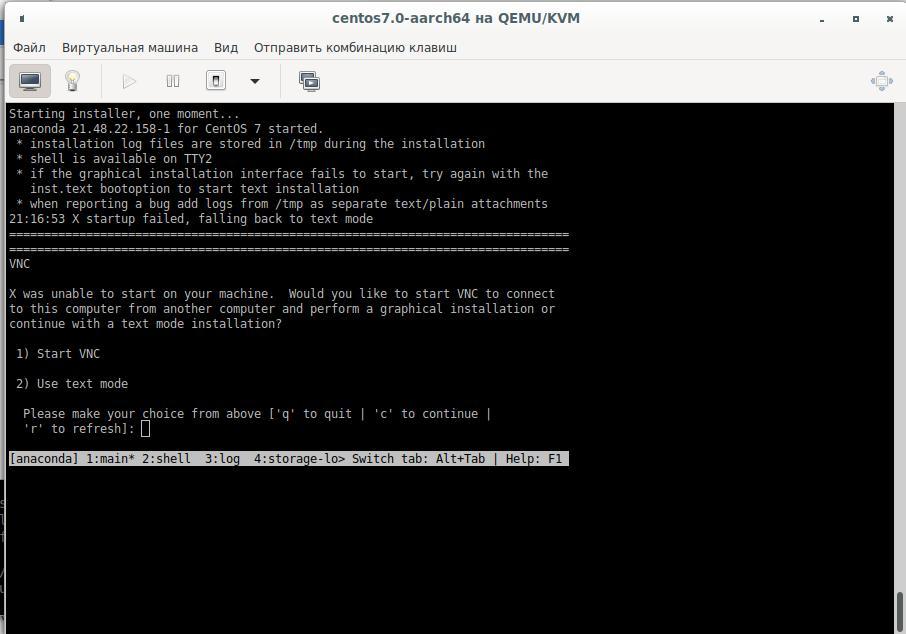
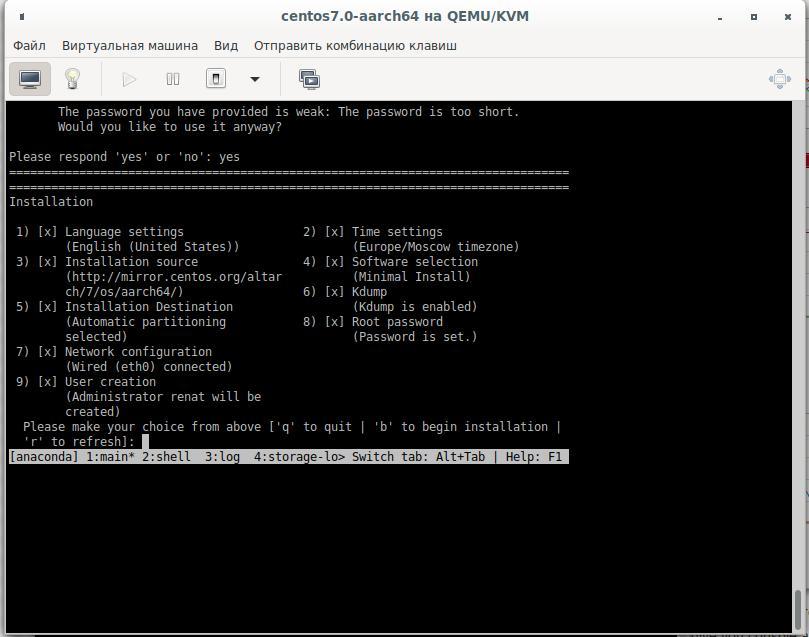
组装将在第二个虚拟磁盘上完成,为此,我们将需要25-30 Gb磁盘。我们通过关闭虚拟机并将其连接到它来创建新的硬盘,然后再次启动。让我们断开硬盘并对其进行格式化:
cfdisk /dev/sdb
mkfs.ext4 /dev/sdb1 -L Qt_Rebuild
mount /dev/sdb1 /30
为什么文件系统不是XFS
XFS, Raspberry, .. XFS.
安装后,我们连接到虚拟机并安装所需的软件包:
yum install centos-release-scl
yum install devtoolset-9-gcc.aarch64
yum install git
export PATH=/opt/rh/devtoolset-9/root/bin/:$PATH
echo clone from git
cd /30
git clone --recursive --single-branch --branch 5.15 git://github.com/qt/qt5.git
cd qt5
配置:
./configure -skip qt3d -no-warnings-are-errors -release -recheck-all --prefix /Qt/5.15.0 -opensource -confirm-license -nomake examples -nomake tests -c++std c++17 -I /usr/include/xcb/ -L /usr/lib/x86_64-linux-gnu/ -xcb-xlib -xcb -feature-thread -feature-xkbcommon -qt-libpng -qt-libjpeg -qt-zlib -I /usr/include/xcb/ -L /usr/lib/x86_64-linux-gnu/ --recheck-all
...
You need perl in your PATH to make a build from GIT.
Cannot proceed.

#yum install perl
我们重复启动配置并获得:
Creating qmake...
gmake: g++: Command not found
gmake: *** [main.o] Error 127
安装编译器并再次配置:
yum install devtoolset-9-gcc-c++.aarch64
...
ERROR: Feature 'xcb' was enabled, but the pre-condition 'features.thread && libs.xcb && tests.xcb_syslibs && features.xkbcommon-x11' failed.

ERROR: Feature 'xcb-xlib' was enabled, but the pre-condition 'features.xlib && libs.xcb_xlib' failed.

ERROR: Feature 'xkbcommon' was enabled, but the pre-condition 'libs.xkbcommon' failed.

ERROR: The OpenGL functionality tests failed!
You might need to modify the include and library search paths by editing QMAKE_INCDIR_OPENGL[_ES2],
QMAKE_LIBDIR_OPENGL[_ES2] and QMAKE_LIBS_OPENGL[_ES2] in the mkspec for your platform.
我们搜索并提供必要的软件包:
yum install libxkbcommon-x11-devel
yum install xcb-util-renderutil-devel
yum install libxcb libxcb-devel libXrender libXrender-devel xcb-util-wm xcb-util-wm-devel xcb-util xcb-util-devel xcb-util-image xcb-util-image-devel xcb-util-keysyms xcb-util-keysyms-devel
我们进行了配置,并且已经收到一个错误:
ERROR: Feature 'xcb-xlib' was enabled, but the pre-condition 'features.xlib && libs.xcb_xlib' failed.添加更多软件包并查看配置日志:
 yum install libxcb libxcb-devel xcb-util xcb-util-devel mesa-libGL-devel libxkbcommon-devel
...
Checking for XCB ICCCM >= 0.3.9... yes
Checking for XCB SHM... yes
Checking for XCB Image >= 0.3.9... yes
Checking for XCB Keysyms >= 0.3.9... yes
Checking for XCB RandR... yes
Checking for XCB XRender... yes
Checking for XCB Renderutil >= 0.3.9... yes
Checking for XCB Shape... yes
Checking for XCB Sync... yes
Checking for XCB Xfixes... yes
Checking for XCB Xinerama... yes
Checking for XCB XKB... yes
Checking for XCB (extensions)... yes
Checking for xkbcommon >= 0.5.0... yes
Checking for xkbcommon-x11... yes
…
Checking for XCB Xlib... yes
Checking for XCB GLX... yes
...
Qt is now configured for building. Just run 'gmake'.
Once everything is built, you must run 'gmake install'.
Qt will be installed into '/Qt/5.15.0'.

Prior to reconfiguration, make sure you remove any leftovers from
the previous build.
好了,一切都准备就绪,但是我们需要检查可能对我们有用的选项:
  OpenGL:
    Desktop OpenGL ....................... yes
    OpenGL ES 2.0 ........................ no
    OpenGL ES 3.0 ........................ no
    OpenGL ES 3.1 ........................ no
    OpenGL ES 3.2 ........................ no

  OpenSSL ................................ no
    Qt directly linked to OpenSSL ........ no
  OpenSSL 1.1 ............................ no
同样,我们可能需要应用程序的网络交互,我们不能仅通过http:
yum install openssl-devel

Dependencies Resolved

================================================================================
 Package                   Arch          Version               Repository  Size
================================================================================
Installing:
 openssl-devel             aarch64       1:1.0.2k-19.el7       base       1.5 M
Installing for dependencies:
 keyutils-libs-devel       aarch64       1.5.8-3.el7           base        37 k
 krb5-devel                aarch64       1.15.1-46.el7         base       272 k
 libcom_err-devel          aarch64       1.42.9-17.el7         base        31 k
 libkadm5                  aarch64       1.15.1-46.el7         base       175 k
 libselinux-devel          aarch64       2.5-15.el7            base       186 k
 libsepol-devel            aarch64       2.5-10.el7            base        76 k
 libverto-devel            aarch64       0.2.5-4.el7           base        11 k
 pcre-devel                aarch64       8.32-17.el7           base       479 k
 zlib-devel                aarch64       1.2.7-18.el7          base        49 k

Transaction Summary
================================================================================
Install  1 Package (+9 Dependent packages)

Total download size: 2.8 M
Installed size: 6.4 M
Is this ok [y/d/N]:
版本1.0.2k,小于Qt要求的版本(将OpenSSL的最低支持版本增加到1.1。)
我们必须构建OpenSSL,然后从源构建Qt:
wget https://www.openssl.org/source/openssl-1.1.1g.tar.gz
-bash: wget: command not found
cd /
curl https://www.openssl.org/source/openssl-1.1.1g.tar.gz -o openssl-1.1.1.g.tar.gz
tar -xvf openssl-1.1.1.g.tar.gz
cd /openssl-1.1.1g
perl Configure
echo   ,   ARM:
perl Configure linux-aarch64
Configuring OpenSSL version 1.1.1g (0x1010107fL) for linux-aarch64
Using os-specific seed configuration
Creating configdata.pm
Creating Makefile

**********************************************************************
***                                                                ***
***   OpenSSL has been successfully configured                     ***
***                                                                ***
***   If you encounter a problem while building, please open an    ***
***   issue on GitHub <https://github.com/openssl/openssl/issues>  ***
***   and include the output from the following command:           ***
***                                                                ***
***       perl configdata.pm --dump                                ***
***                                                                ***
***   (If you are new to OpenSSL, you might want to consult the    ***
***   'Troubleshooting' section in the INSTALL file first)         ***
***                                                                ***
**********************************************************************
make && make install然后,我们根据虚拟机设置中指定的处理器数量(如果您决定创建具有4个处理器的VM),再次配置Qt并使用make或make -j4命令开始构建它。
应用程序构建崩溃于:
make[3]: Entering directory `/30/qt5/qtsvg/src/svg'
g++ -c -include .pch/Qt5Svg -pipe -O2 -std=c++1z -fvisibility=hidden -fvisibility-inlines-hidden -fno-exceptions -Wall -Wextra -Wvla -Wdate-time -Wshift-overflow=2 -Wduplicated-cond -Wno-stringop-overflow -Wno-format-overflow -D_REENTRANT -fPIC -DQT_NO_LINKED_LIST -DQT_NO_FOREACH -DQT_NO_USING_NAMESPACE -DQT_NO_NARROWING_CONVERSIONS_IN_CONNECT -DQT_BUILD_SVG_LIB -DQT_BUILDING_QT -DQT_NO_CAST_TO_ASCII -DQT_ASCII_CAST_WARNINGS -DQT_MOC_COMPAT -DQT_USE_QSTRINGBUILDER -DQT_DEPRECATED_WARNINGS -DQT_DISABLE_DEPRECATED_BEFORE=0x050000 -DQT_DEPRECATED_WARNINGS_SINCE=0x060000 -DQT_NO_EXCEPTIONS -D_LARGEFILE64_SOURCE -D_LARGEFILE_SOURCE -DQT_NO_DEBUG -DQT_WIDGETS_LIB -DQT_GUI_LIB -DQT_CORE_LIB -DQT_ZLIB_LIB -I. -I../../include -I../../include/QtSvg -I../../include/QtSvg/5.15.0 -I../../include/QtSvg/5.15.0/QtSvg -I/30/qt5/qtbase/include/QtWidgets/5.15.0 -I/30/qt5/qtbase/include/QtWidgets/5.15.0/QtWidgets -I/30/qt5/qtbase/include/QtGui/5.15.0 -I/30/qt5/qtbase/include/QtGui/5.15.0/QtGui -I/30/qt5/qtbase/include/QtCore/5.15.0 -I/30/qt5/qtbase/include/QtCore/5.15.0/QtCore -I/30/qt5/qtbase/include -I/30/qt5/qtbase/include/QtWidgets -I/30/qt5/qtbase/include/QtGui -I/30/qt5/qtbase/include/QtCore -I/30/qt5/qtbase/include/QtZlib -I/30/qt5/qtbase/include/QtZlib/5.15.0 -I/30/qt5/qtbase/include/QtZlib/5.15.0/QtZlib -I.moc -I/usr/include/libdrm -I/usr/include/xcb -I/usr/include/xcb -I/30/qt5/qtbase/mkspecs/linux-g++ -o .obj/qsvgfont.o qsvgfont.cpp
In file included from /30/qt5/qtbase/include/QtGui/qopenglversionfunctions.h:1,
                 from /30/qt5/qtbase/include/QtGui/../../src/gui/kernel/qopenglcontext.h:61,
                 from /30/qt5/qtbase/include/QtGui/qopenglcontext.h:1,
                 from /30/qt5/qtbase/include/QtGui/QtGui:49,
                 from ../../include/QtSvg/QtSvgDepends:4:
/30/qt5/qtbase/include/QtGui/../../src/gui/opengl/qopenglversionfunctions.h: In instantiation of ‘class QVector<double>’:
qsvgstyle_p.h:696:20:   required from here
/30/qt5/qtbase/include/QtGui/../../src/gui/opengl/qopenglversionfunctions.h:201:5: internal compiler error: in tsubst_function_decl, at cp/pt.c:12967
  201 |     QAbstractOpenGLFunctionsPrivate()
      |     ^~~~~~~~~~~~~~~~~~~~~~~~~~~~~~~
Please submit a full bug report,
with preprocessed source if appropriate.
See <http://bugzilla.redhat.com/bugzilla> for instructions.
make[3]: *** [.obj/qsvgfont.o] Error 1
make[3]: Leaving directory `/30/qt5/qtsvg/src/svg'
make[2]: *** [sub-svg-make_first-ordered] Error 2
make[2]: Leaving directory `/30/qt5/qtsvg/src'
make[1]: *** [sub-src-make_first] Error 2
make[1]: Leaving directory `/30/qt5/qtsvg'
make: *** [module-qtsvg-make_first] Error 2
我们安装了其他版本的软件包,并在尝试3上获得了它:
-
yum install harfbuzz-devel yum install at-spi2-atk-devel at-spi2-core-devel dbus-devel glib2-devel graphite2-devel keyutils-libs-devel krb5-devel libcom_err-devel libicu-devel libselinux-devel libsepol-devel libverto-devel pcre-devel zlib-devel-
yum install mesa-libGLw-devel
配置和组装正在进行中。我们在QtCreator中创建一个测试应用程序(带有程序集qmake),将源复制到虚拟机并构建该应用程序。Binar已准备就绪,仍需要在Raspberry上进行测试。
2.在Raspberry模拟器中运行
由于在本文的框架内我们正在仿真一个ARM处理器,这意味着我们还将在虚拟机中运行链接1 链接2 链接3:从Raspberry网站
下载官方映像,并为仿真器运行内核(我创建了这样的启动文件):
echo create disk for Qt sources and Projects
qemu-img create -f qcow2 qt-rebuild-25gb-disk.qcow2 25G
cat start-emul.sh
#!/bin/bash

path_img=/home/user/Project/qemu
path_kernel=/home/user/qemu/qemu-rpi-kernel
sudo qemu-system-arm -kernel $path_kernel/kernel-qemu-4.19.50-buster -dtb $path_kernel/versatile-pb-buster.dtb \
-cpu arm1176 -m 256 -M versatilepb -append "root=/dev/sda2 rw" -net nic -net user,hostfwd=tcp::5022-:22 \
-net tap,ifname=vnet0,script=no,downscript=no -hdb $path_img/qt-rebuild-25gb-disk.qcow2 -no-reboot -hda $path_img/2020-05-27-raspios-buster-armhf.img
尝试启动我们的应用程序:
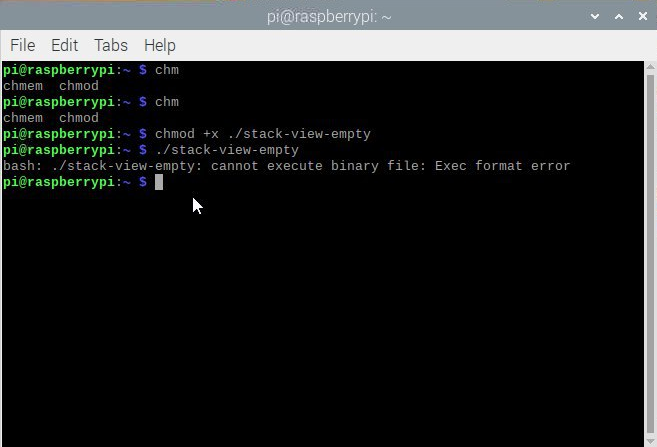
为什么?我们看一下处理器:
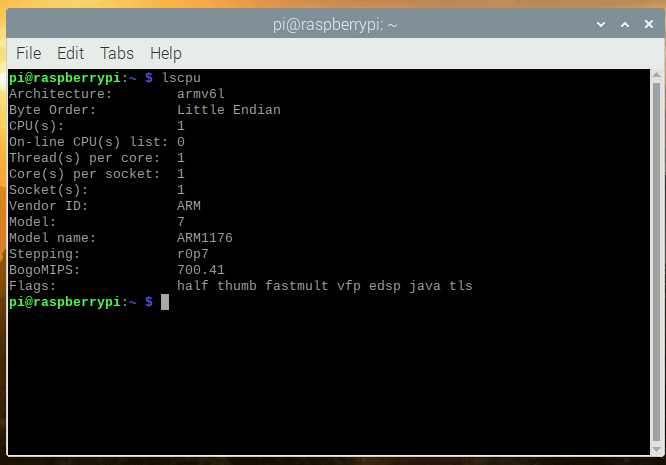
我们看一下CentOS中的配置文件:
[root@aaarch-qemu qt5]# cat config.summary |grep CPU
Build type: linux-g++ (arm64, CPU features: cx16 neon)
好了,我们已经编译了一个64位的armv8应用程序,并试图在具有armv6处理器的32位仿真器中运行它。我希望具有新64位处理器的真实设备的所有者能够在评论中退订,无论他们是否设法在真实设备上运行该应用程序。
好吧,没关系,我们现在可以在Raspberry仿真器中收集吗?我们发现在调用df -h命令后,我们的可用磁盘空间非常小。最简单的方法是复制映像文件,将其放大,通过增加第二台计算机上的根分区来启动具有两个文件系统的虚拟机,然后使用第二个映像。走:
qemu-img convert 2020-05-27-raspios-buster-armhf.img 2020-05-27-raspios-buster-armhf-10gb.qcow2 -O qcow2 -p
qemu-img resize 2020-05-27-raspios-buster-armhf-10gb.qcow2 +6G
将另一个硬盘驱动器添加到启动脚本:
-hdc 2020-05-27-raspios-buster-armhf-10gb.qcow2
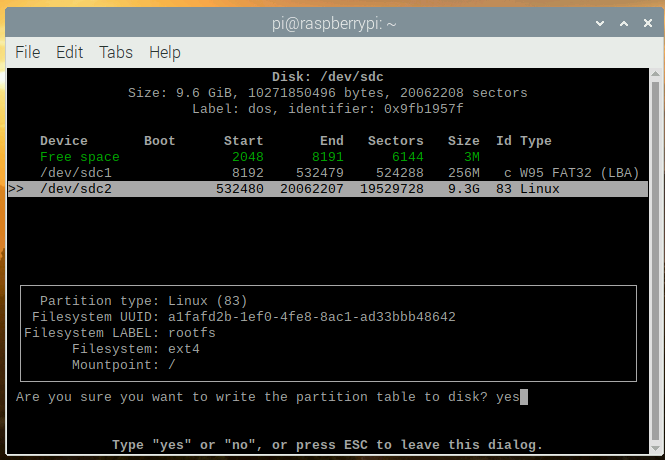
启动后,编辑此硬盘驱动器sudo cfdisk / dev / sdc:
调整大小:

写入并确认是:
不要忘记检查,磁盘已成为我们所需的大小:
sudo mkdir /test
sudo mount /dev/sdc2 /test
df -h
Filesystem      Size  Used Avail Use% Mounted on
/dev/root       3.2G  2.8G  257M  92% /
devtmpfs        124M     0  124M   0% /dev
tmpfs           124M     0  124M   0% /dev/shm
tmpfs           124M  2.0M  122M   2% /run
tmpfs           5.0M     0  5.0M   0% /run/lock
tmpfs           124M     0  124M   0% /sys/fs/cgroup
/dev/sdc1       253M   51M  202M  21% /boot
tmpfs            25M     0   25M   0% /run/user/1000
/dev/sdc2       3.2G  2.7G  358M  89% /test
未添加连接到/ test文件夹的sdc磁盘的大小,让我们对其进行修复:
sudo umount /test
sudo fsck -f /dev/sdc2
sudo resize2fs /dev/sdc2
resize2fs 1.44.5 (15-Dec-2018)
Please run 'e2fsck -f /dev/sdc2' first.

pi@raspberrypi:~ $ e2fsck -f /dev/sdc2
e2fsck 1.44.5 (15-Dec-2018)
e2fsck: Permission denied while trying to open /dev/sdc2
You must have r/w access to the filesystem or be root
pi@raspberrypi:~ $ sudo e2fsck -f /dev/sdc2
e2fsck 1.44.5 (15-Dec-2018)
Pass 1: Checking inodes, blocks, and sizes
Pass 2: Checking directory structure
Pass 3: Checking directory connectivity
Pass 4: Checking reference counts
Pass 5: Checking group summary information
rootfs: 106640/217296 files (0.3% non-contiguous), 729343/868352 blocks
pi@raspberrypi:~ $ sudo resize2fs /dev/sdc2
resize2fs 1.44.5 (15-Dec-2018)
Resizing the filesystem on /dev/sdc2 to 2441216 (4k) blocks.
The filesystem on /dev/sdc2 is now 2441216 (4k) blocks long.

sudo mount /dev/sdc2 /test
pi@raspberrypi:~ $ df -h
Filesystem      Size  Used Avail Use% Mounted on
/dev/root       3.2G  2.8G  259M  92% /
devtmpfs        124M     0  124M   0% /dev
tmpfs           124M     0  124M   0% /dev/shm
tmpfs           124M  2.0M  122M   2% /run
tmpfs           5.0M     0  5.0M   0% /run/lock
tmpfs           124M     0  124M   0% /sys/fs/cgroup
/dev/sdc1       253M   51M  202M  21% /boot
tmpfs            25M     0   25M   0% /run/user/1000
/dev/sdc2       9.2G  2.7G  6.0G  31% /test
关闭虚拟机。再次编辑start-emul.sh文件,将hda硬盘驱动器替换为新的硬盘驱动器,并删除指向第三个硬盘驱动器-hdc的链接。现在,我们有了一个具有更多空间的文件系统。
现在,我们可以将硬盘与第一个虚拟机的Qt源连接起来。
建议:最好从临时文件“清理源”,即 返回git的状态,这是在配置之前克隆存储库时的状态:
cd /30/qt5
git reset --hard
git submodule foreach --recursive 'git reset HEAD . || :'
git submodule foreach --recursive 'git checkout -- . || :'
git clean -d -f -f -x
git submodule foreach --recursive git clean -d -f -f -x
因此在Debian中,我们需要:
sudo apt install gcc-arm-none-eabi
sudo apt install wget build-essential \
 ^libxcb.*-dev \
libopenal-dev \
flite1-dev   libspeechd-dev \
libudev-dev \
libinput-dev \
libxkbcommon-x11-dev curl libssl-dev time -y

sudo apt install libx11-dev -y \
    libfontconfig1-dev \
    libfreetype6-dev \
    libx11-dev \
    libxext-dev \
    libxfixes-dev \
    libxi-dev \
    libxrender-dev \
    libxcb1-dev \
    libx11-xcb-dev \
    libxcb-glx0-dev \
    libxkbcommon-x11-dev \
    mesa-common-dev \
libgl1-mesa-dev
配置:
cd /30/qt5
./configure -skip qt3d -no-warnings-are-errors -release -recheck-all -prefix /Qt/5.15.0 -opensource -confirm-license -nomake examples -nomake tests -c++std c++17 -I /usr/include/xcb/ -L /usr/lib/x86_64-linux-gnu/ -xcb-xlib -xcb -feature-thread -feature-xkbcommon -qt-libpng -qt-libjpeg -qt-zlib -I /usr/include/xcb/ -L /usr/lib/x86_64-linux-gnu/ --recheck-all -skip wayland -skip qtwebengine -skip qtwayland
还出现错误:
ERROR: Feature 'xcb-xlib' was enabled, but the pre-condition 'features.xlib && libs.xcb_xlib' failed.

ERROR: The OpenGL functionality tests failed!
You might need to modify the include and library search paths by editing QMAKE_INCDIR_OPENGL[_ES2],
QMAKE_LIBDIR_OPENGL[_ES2] and QMAKE_LIBS_OPENGL[_ES2] in the mkspec for your platform.理事会。您是否在QEMU图形窗口中键入了这些命令?别忘了,我们有ssh:您需要在ssh服务器虚拟机中启动:sudo systemctl start ssh && sudo systemctl启用ssh并从本地计算机连接到虚拟机ssh pi @ localhost -p 5022用户pi密码raspberry
安装另一个dev软件包:
sudo apt install wget build-essential  ^libxcb.*-dev libopenal-dev flite1-dev   libspeechd-dev libudev-dev libinput-dev libxkbcommon-x11-dev curl libssl-dev time -y
sudo apt install libasound2-dev libavcodec-dev libclipper-dev libdbus-1-dev libdrm-dev libegl-dev libgles2-mesa-dev
sudo  apt install libx11-dev libfontconfig1-dev libfreetype6-dev libx11-dev libxext-dev libxfixes-dev libxi-dev libxrender-dev libxcb1-dev libx11-xcb-dev libxcb-glx0-dev libxkbcommon-x11-dev mesa-common-dev libgl1-mesa-dev
我们配置并获取配置结果的输出:
time ./configure -skip qt3d -no-warnings-are-errors -release -recheck-all -prefix /Qt/5.15.0 -opensource -confirm-license -nomake examples -nomake tests -c++std c++17 -I /usr/include/xcb/ -L /usr/lib/x86_64-linux-gnu/ -xcb-xlib -xcb -feature-thread -feature-xkbcommon -qt-libpng -qt-libjpeg -qt-zlib -I /usr/include/xcb/ -L /usr/lib/x86_64-linux-gnu/ --recheck-all -skip wayland -skip qtwebengine -skip qtwayland
............Done.
Info: creating super cache file /30/qt5/.qmake.super
Info: creating cache file /30/qt5/.qmake.cache
Info: creating stash file /30/qt5/.qmake.stash
This is the Qt Open Source Edition.
You have already accepted the terms of the Open Source license.
Running configuration tests…
…
Note: Option 'cache_use' with value 'none' was specified twice
Note: Also available for Linux: linux-clang linux-icc
Note: Disabling X11 Accessibility Bridge: D-Bus or AT-SPI is missing.
WARNING: QDoc will not be compiled, probably because libclang could not be located. This means that you cannot build the Qt documentation.
Either ensure that llvm-config is in your PATH environment variable, or set LLVM_INSTALL_DIR to the location of your llvm installation.
On Linux systems, you may be able to install libclang by installing the libclang-dev or libclang-devel package, depending on your distribution.
On macOS, you can use Homebrew's llvm package.
On Windows, you must set LLVM_INSTALL_DIR to the installation path.
Qt is now configured for building. Just run 'make'.
Once everything is built, you must run 'make install'.
Qt will be installed into '/Qt/5.15.0'.
Prior to reconfiguration, make sure you remove any leftovers from
the previous build.
real 91m49.471s
user 78m43.608s
sys 7m22.934s
输出有关配置结果的信息
那些已经阅读了这一点但仍然有热情尝试的人,将获得关于配置阶段速度的
现在,您的计算机的1个内核将花费很长时间来构建Qt并可能进行构建,并且可能会出现错误,即在构建过程中没有足够的内存或错误。为此,我建议创建一个1-1.5 Gb交换文件并连接它:
sudo dd if=/dev/zero of=/30/swap1500 bs=256M count=6 status=progress
dd: memory exhausted by input buffer of size 268435456 bytes (256 MiB)

sudo dd if=/dev/zero of=/30/swap1500 bs=128M count=12 status=progress
1610612736 bytes (1.6 GB, 1.5 GiB) copied, 82 s, 19.6 MB/s
12+0 records in
12+0 records out
1610612736 bytes (1.6 GB, 1.5 GiB) copied, 82.223 s, 19.6 MB/s

sudo chmod 600 /30/swap1500
sudo mkswap /30/swap1500
Setting up swapspace version 1, size = 1.5 GiB (1610608640 bytes)
no label, UUID=af79f154-6904-4b6d-8c1d-61890bdda556

sudo swapon /30/swap1500

free
              total        used        free      shared  buff/cache   available
Mem:         252228       24652      142532         536       85044      179184
Swap:       1675256       69888     1605368
我们收集并安装:
make && sudo make install如果需要其他模块,那么我们总是可以添加它们,例如qtquickcontrols2:
export PATH=/Qt/5.15.0/bin:$PATH
cd /30/qt5/qtuickcontrols2/
qmake
make && sudo make install
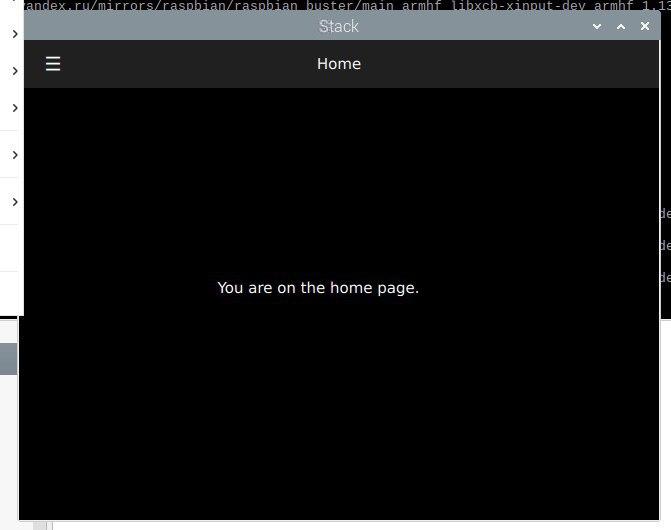
之后,我们收集应用程序,并启动它:
结论
使用QEMU仿真器可以在x86设备上为ARM构建应用程序。我以为我会在一周内写这篇文章,但是这个过程拖了将近三周,因为每个阶段都花费很长时间(安装系统,更新系统,安装开发包以及从github获取Qt源代码)。例如,在Raspberry仿真器中构建静态版本的Qt花了我1426分钟的时间。
它更快吗?是的,它被称为Cross build。为此,请配置sysroot,安装ARM编译器,在主机系统上配置并构建Qt。然后,他们将QtCreator配置为使用此版本的Qt,并在其x86计算机/笔记本电脑上构建该应用程序,获得可以在嵌入式linux上运行的版本。链接1 链接2因为 这已经超出了本文的讨论范围,如果我有时间或有启发,也许我会写这篇文章,但是也许其他人会为最新版本的Qt 5.15写这篇文章。
好吧,我重复一遍,如果有人想重复第二章中关于ARM Raspberry仿真器的步骤,您可以写出构建qmake和配置阶段所花的时间,并在注释中指出您的处理器。
感谢您的关注。祝您有创造力!